
Restoring Files and Records with a UI alongside Kasten


Veeam Kasten has been very focused on file level recovery of late, now with the release of v8.0 we officially support FLR on VMs in SuSE Harvester and RedHat OpenShift through the use of Veeam Backup and Replication. However what if you wanted to do FLR on native applications on a file or record level?
My colleague Michael outlined an approach here, highlighting record level recovery using postgresql:
Granular Table Restore with Kasten K10
One issue with this is that many organisations operate a self service model, whereby the end users have to process their own rollbacks and often have little knowledge of the Kubernetes platform their application might run upon. Expecting them to be able to fight through, deployments, pods, exposures, PVCs etc is wishful thinking at best, pushing the workload back onto the infrastructure team again and making the self service model redundant.
What is needed is a UI that anyone can understand, use and adapt. I'm going to show two approaches, one for basic file recovery and another for postgresql records. These use open-source tools and projects to accomplish this goal and could be adapted through automation and scripting to serve as a basis for a more robust solution. It's not feasible for Kasten to support every scenario, however end users can build their own solutions to fit their unique use cases, which is one of Kasten's core strengths...everything we do is based upon Kubernetes standards and driven through the API. Unlike external management server solutions, which may require UI's to be built and maintained by a vendor..often with protracted timescales, end users can use whatever they deem fit to get the job done.
Basic FLR using a File Browser application
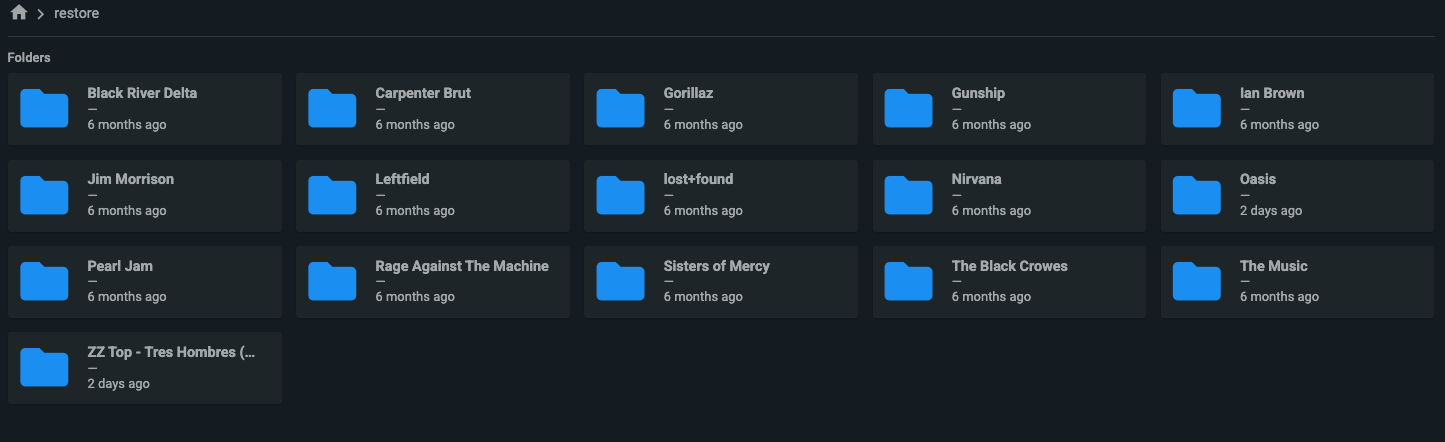
In our first scenario I'm going to use a basic Spotify clone application called Navidrome, which allows users to browse and play mp3 files stored on a PVC. These mp3's are our FLR data. We are going to deliberately delete an entire album and then recover it.
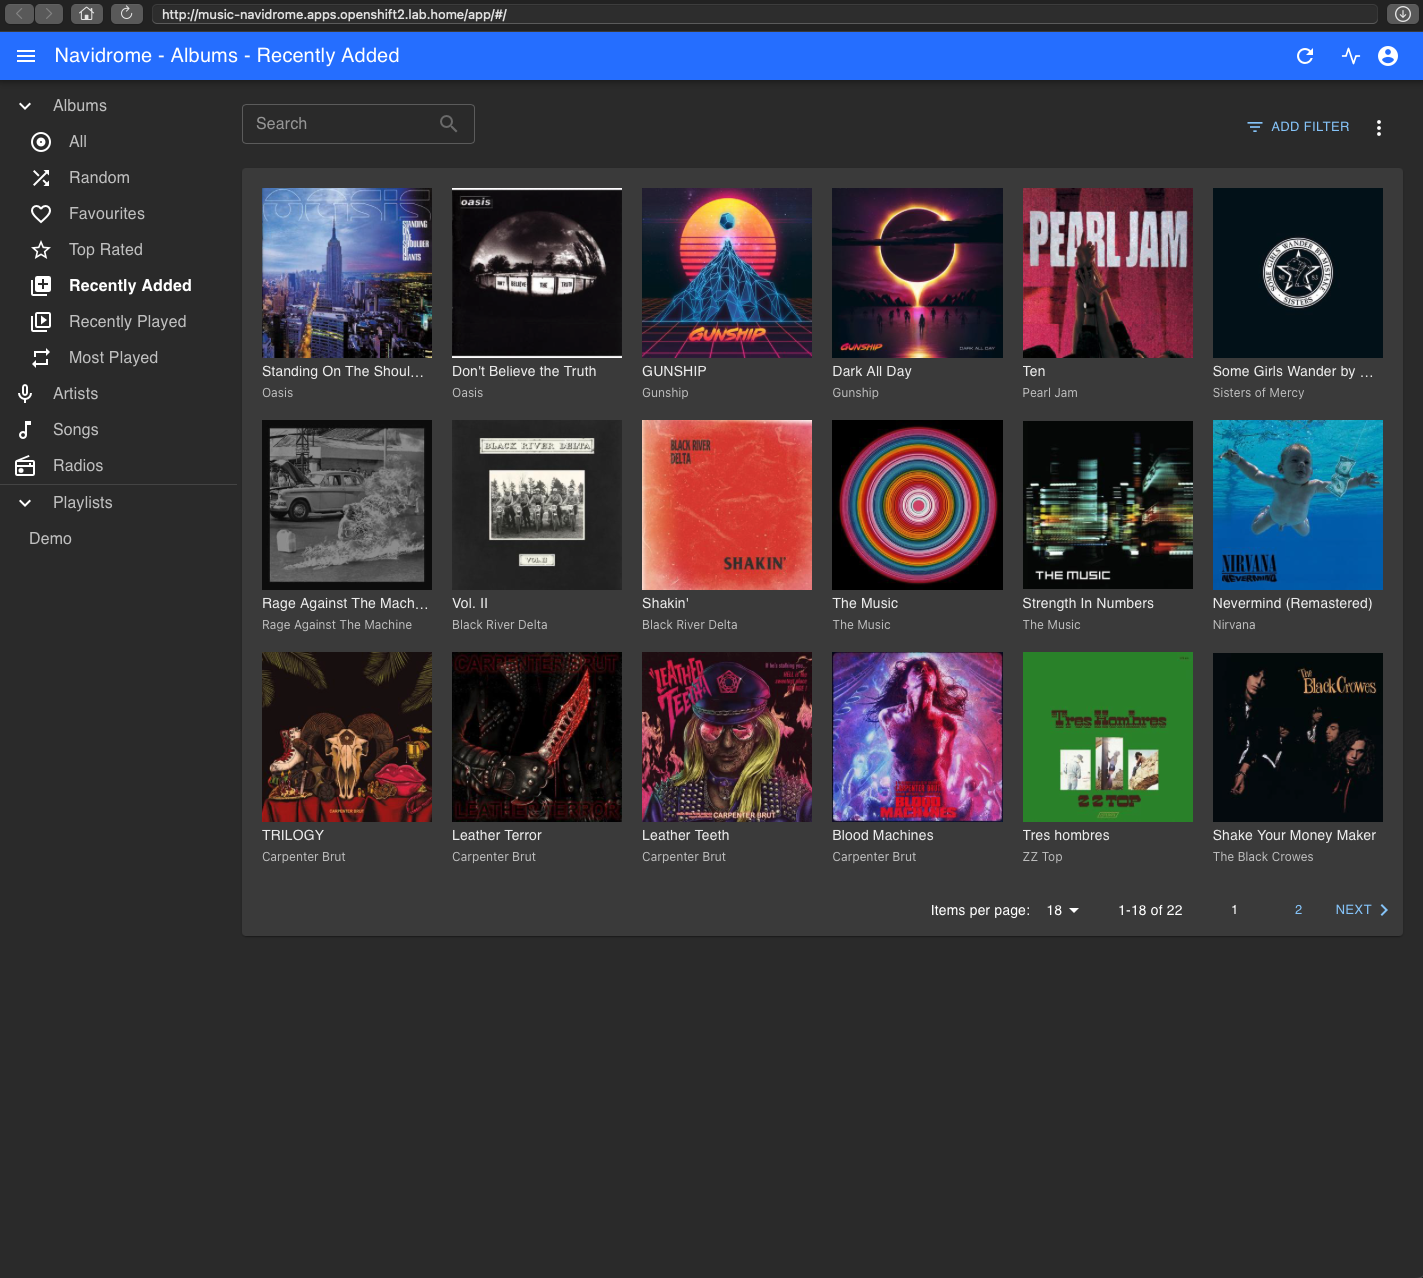
As seen above we have two Oasis albums, we will delete these. We can Terminal into the pod and see the music collection, and delete the Oasis folder which contains the two album folders:
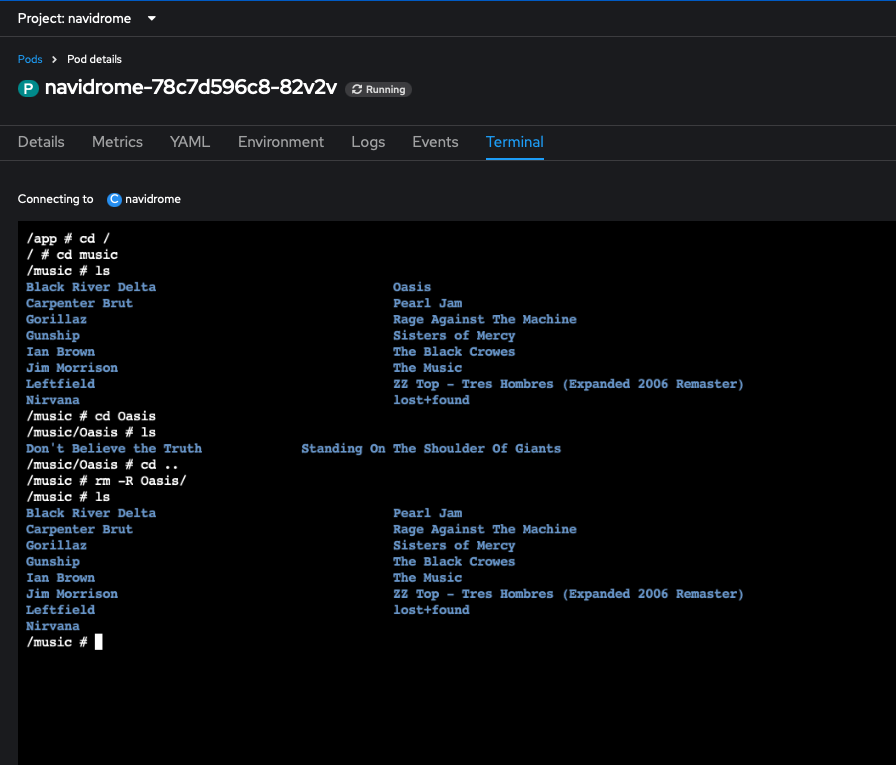
So bye bye Oasis.....
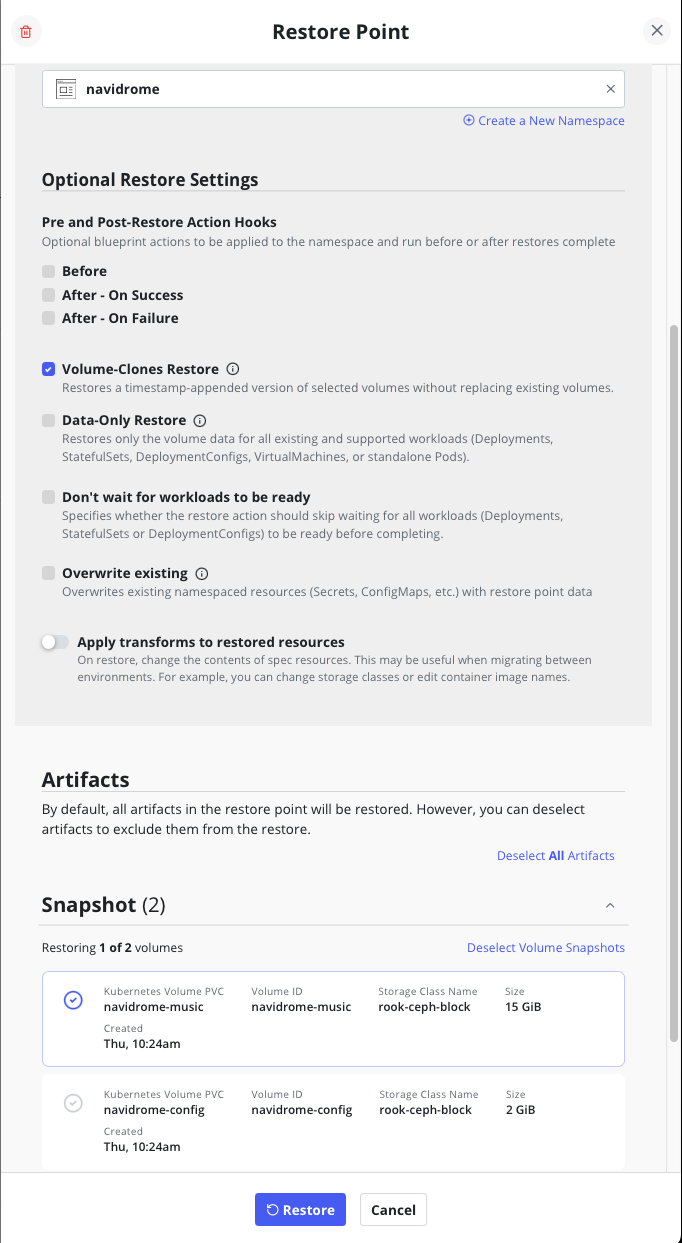
Now we have to get them back without rolling back the entire PVC. To accomplish this we will do a 'clone volume restore' which restores the PVC with alongside the original PVC, just with a date stamp appended to the end of it, then deploy a manifest which will spin up our file-browser app, create a service for it and expose that via a route. The manifest will mount both the original PVC and the cloned one. Because the original PVC is in RWO mode this must be done on the same worker node where the application functions in order for the browser app to get access. You can see the code of the manifest below:
apiVersion: apps/v1
kind: Deployment
metadata:
  name: filebrowser-deployment
spec:
  replicas: 1
  selector:
    matchLabels:
      app: filebrowser
  template:
    metadata:
      labels:
        app: filebrowser
    spec:
      containers:
        - name: browser
          image: filebrowser/filebrowser
          ports:
            - containerPort: 80
              name: http
          volumeMounts:
            - name: restore
              mountPath: /srv/restore
            - name: original
              mountPath: /srv/original
      volumes:
        - name: restore
          persistentVolumeClaim:
            claimName: navidrome-music-2025-05-28-09-20-09
        - name: original
          persistentVolumeClaim:
            claimName: navidrome-music
---
apiVersion: v1
kind: Service
metadata:
  name: filebrowser-service
spec:
  type: ClusterIP
  selector:
    app: filebrowser
  ports:
    - port: 80
      targetPort: http
      protocol: TCP
      name: http
---
kind: Route
apiVersion: route.openshift.io/v1
metadata:
  name: filebrowser
  namespace: navidrome
  annotations:
    openshift.io/host.generated: 'true'
spec:
  host: filebrowser.apps.openshift2.lab.home
  path: /
  to:
    kind: Service
    name: filebrowser-service
    weight: 100
  port:
    targetPort: http
  wildcardPolicy: None
We make sure when we do the restore of the PVC we select the original namespace, the correct PVC and the "volume-clones restore" option is ticked.
Whilst that is running let's go back to our application and try and play one of those missing songs... Even though the file index says it should be there it won't play and we get a spinning wheel of doom:

Ok the restore should be done now, and we can confirm we have a date appended PVC in the navidrome namespace.

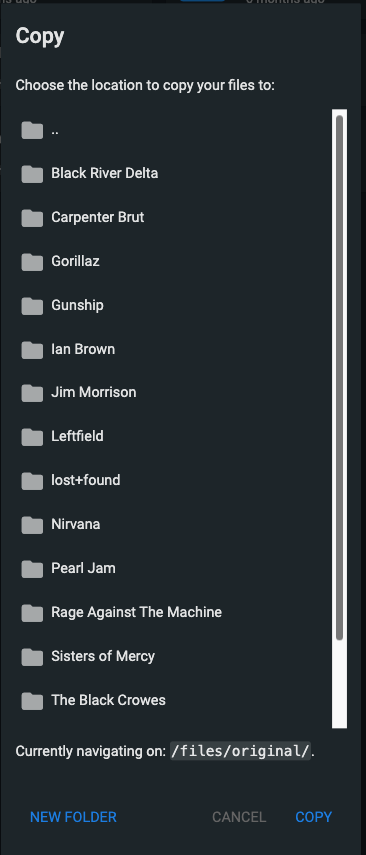
We now modify our manifest with the clone PVC name and apply it to the application namespace. Once the file browser pods are up, open the route URL and we log in. We can see both original and restore folders for both PVCs:
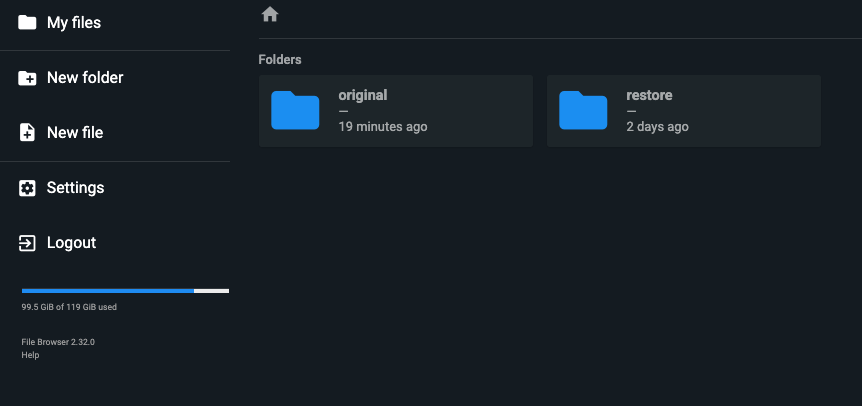
In the restored PVC we can see the Oasis folder, select it and copy it to the original PVC:
If we go back to our app now and attempt to play an Oasis track, it will work now.

This is a very simple demonstration of what is possible. A lot of what was done manually could be scripted either externally, kicking off the PVC restore via an injected policy, or via a post-restore hook kanister job to run a kubexec command to deploy the manifest, with variable substitutions to get the correct PVC names. I may write a further article on how to do that soon.
Postgresql UI Record Recovery
A very similar approach is taken with the DB approach, however we are going to recover the PVC to a separate namespace, not back into the main application namespace. The reason for this is we actually need to spin up a new DB server to use the recovered DB, and this is easier and safer to do in isolation. To cut this down a lot of the steps are similar to the above example except the manifest and restore procedure is slightly modified. We will do a straight forward PVC only restore into a namespace of our choosing, preferable empty. Once this restore is done we deploy a manifest which contains a bitnami postgresql deployment, a pgAdmin4 deployment, the services for both and a route to expose pgAdmin4. pgAdmin4 is a graphical, web-based UI for managing postgresql DB's. Similar tools exist for MySQL, Mongo etc.
apiVersion: apps/v1
kind: Deployment
metadata:
  annotations:
    kompose.cmd: kompose convert
    kompose.version: 1.31.2 (a92241f79)
  labels:
    io.kompose.service: recoverydb
  name: recovery-db
spec:
  replicas: 1
  selector:
    matchLabels:
      io.kompose.service: recovery-db
  strategy:
    type: Recreate
  template:
    metadata:
      annotations:
        kompose.cmd: kompose convert
        kompose.version: 1.31.2 (a92241f79)
      labels:
        io.kompose.network/sql-recovery-default: "true"
        io.kompose.service: recovery-db
    spec:
      securityContext:
        capabilities:
          drop:
            - ALL
        privileged: false
        runAsUser: 1000800000
        runAsNonRoot: true
        readOnlyRootFilesystem: true
        allowPrivilegeEscalation: false
      containers:
        - env:
            - name: POSTGRES_PASSWORD
              value: admin
            - name: POSTGRES_USER
              value: admin
          image: bitnami/postgresql:17
          name: recovery-pgdb
          ports:
            - containerPort: 5432
              protocol: TCP
          resources: {}
          volumeMounts:
            - mountPath: /bitnami/postgresql
              name: recovered
      restartPolicy: Always
      volumes:
        - name: recovered
          persistentVolumeClaim:
            claimName: data-postgres-postgresql-0
---
apiVersion: v1
kind: Service
metadata:
  annotations:
    kompose.cmd: kompose convert
    kompose.version: 1.31.2 (a92241f79)
  labels:
    io.kompose.service: recovery-db
  name: recovery-db
spec:
  selector:
    io.kompose.service: recovery-db
  ports:
    - name: "postgres-recovery"
      port: 5432
      targetPort: 5432
---
apiVersion: apps/v1
kind: Deployment
metadata:
  annotations:
    kompose.cmd: kompose convert
    kompose.version: 1.31.2 (a92241f79)
  labels:
    io.kompose.service: pgadmin
  name: pgadmin
spec:
  replicas: 1
  selector:
    matchLabels:
      io.kompose.service: pgadmin
  strategy: {}
  template:
    metadata:
      annotations:
        kompose.cmd: kompose convert
        kompose.version: 1.31.2 (a92241f79)
      labels:
        io.kompose.network/sql-recovery-default: "true"
        io.kompose.service: pgadmin
    spec:
      containers:
        - env:
            - name: PGADMIN_DEFAULT_EMAIL
              value: admin@local.com
            - name: PGADMIN_DEFAULT_PASSWORD
              value: admin
          image: dpage/pgadmin4
          name: pgadmin4
          ports:
            - containerPort: 80
              protocol: TCP
          resources: {}
      restartPolicy: Always
---
apiVersion: v1
kind: Service
metadata:
  annotations:
    kompose.cmd: kompose convert
    kompose.version: 1.31.2 (a92241f79)
  labels:
    io.kompose.service: pgadmin
  name: pgadmin
spec:
  ports:
    - name: "pgadmin"
      port : 80
      targetPort: 80
  selector:
    io.kompose.service: pgadmin
---
apiVersion: route.openshift.io/v1
kind: Route
metadata:
  annotations:
    openshift.io/host.generated: "true"
  name: db-recovery
spec:
  host: db-recovery.apps.openshift2.lab.home
  path: /
  port:
    targetPort: pgadmin
  to:
    kind: Service
    name: pgadmin
    weight: 100
  wildcardPolicy: None
Note the securityContext statements, these are important to get the PVC mounted with the correct permissions to read it and this will change depending upon the DB's coder, the above runAsUser ID is specific to bitnami for example. It must match the original Db's ownership.
Once we recovery the PVC to our new namespace and spin up this manifest we can log into pgAdmin 4 and add our recovery DB server:
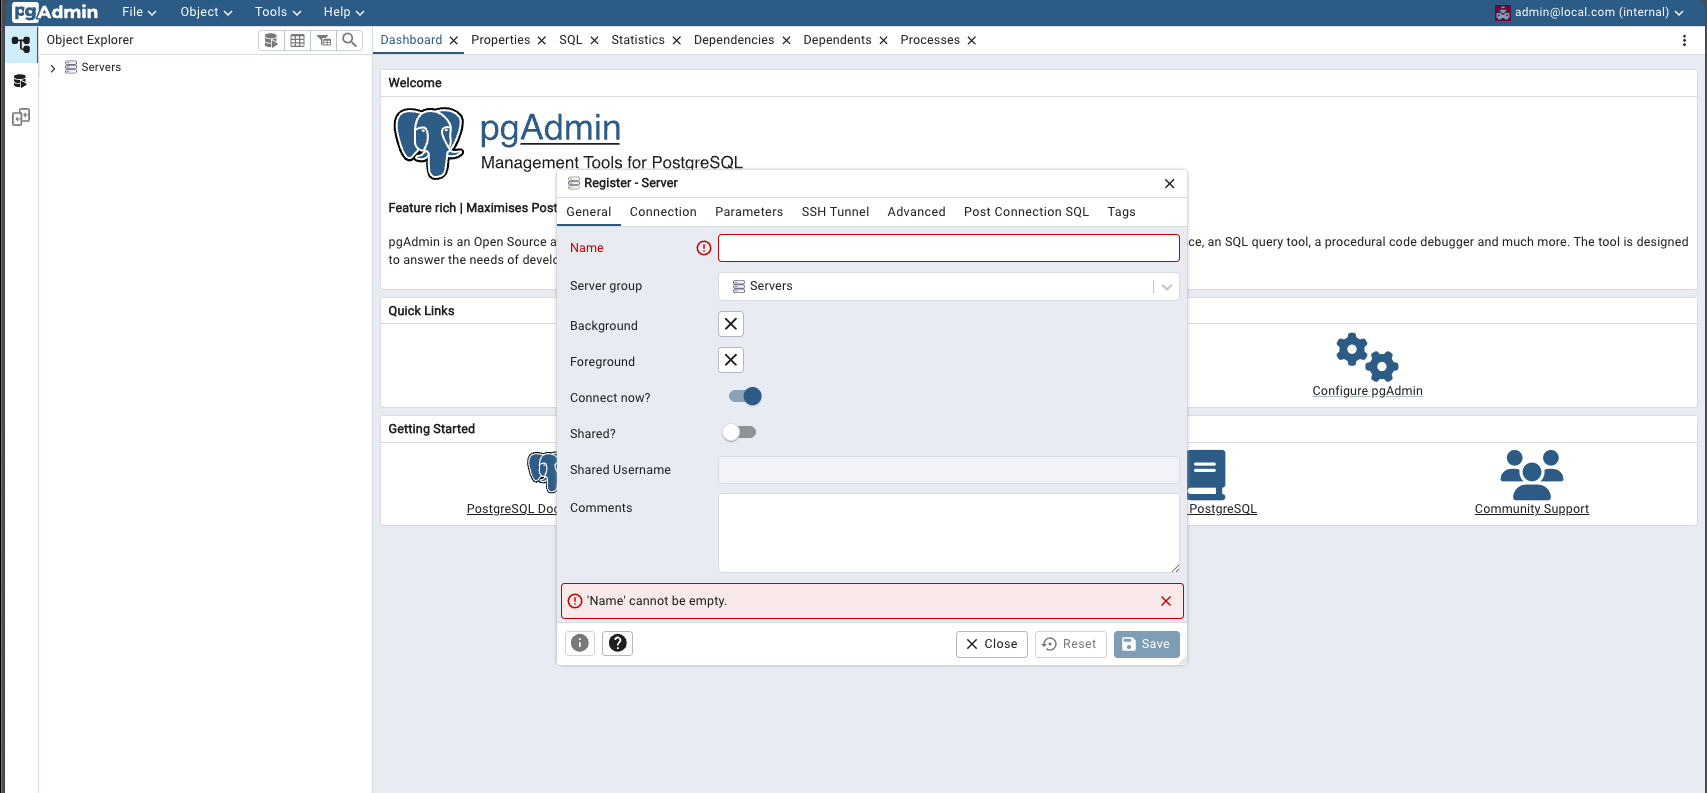
Give the server a name and on the connection tab fill in the hostname using the ClusterIP address of the DB service we just spun up in the new namespace. The username/password will be the ORIGINAL DB's details which can be gained from the secret in the original DB's namespace.
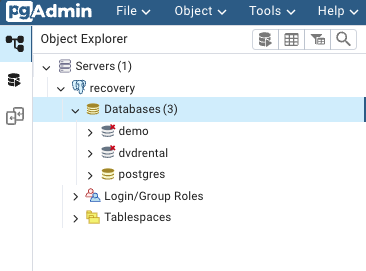
Once you connect you should see the DB's and can explore schemas, tables, write queries and extract/export data for recovery back to the source DB.
Conclusion
Whilst not exhaustive, the intent was to show that end users can build their own UI's to their specific needs and enhance their own recovery workflows.